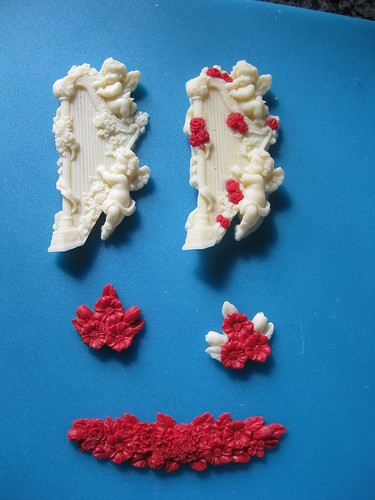
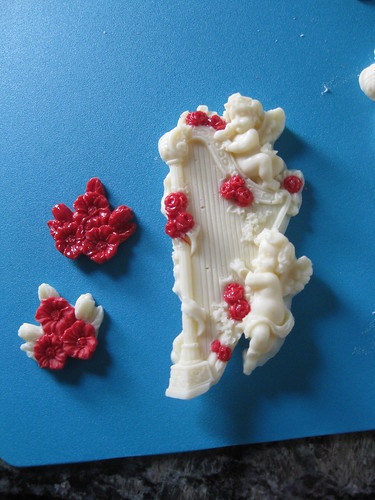
When I saw these molds I thought that the harp looked so like a Michelangelo sculpture, I tried to get that effect by using chocolate and candy melts which are opaque instead of using poured sugar. The result does in fact look like a statue and would make a great stand alone candy piece, or be lovely atop a wedding cake or valentine.
To make these candy molds, you can use either candy melts, or almond bark or melting chocolate. I feel like it is more economical to use almond bark when color is not necessary. You will also need a decorator piping bag for each color you plan to use. Depending on the temperature in your kitchen and how fast you work, you may also like to use a heated work surface. I use a heating pad under a cookie sheet when my candy is setting too quickly. I also like to work with multiple molds and colors at the same time. If multi-tasking is not your thing, you can plan your layers of color and work one color at a time.
Put your candy melts or chopped up almond bark into the decorators bags. Melt in the microwave at 30 second intervals one bag at a time. Be sure to check for hot spots, mash the bags around to mix, and towards the end I often drop down to 15 second intervals to ensure that I don't burn the candy or melt the plastic. Depending on how fast you work and the temperature in your work space you might need to experiment with out long you melt your candy.
Once the candy is melted, snip the tip of the bag. For very fine detailed work, go about 1/8th of an inch. For larger areas, you can go a bit bigger.
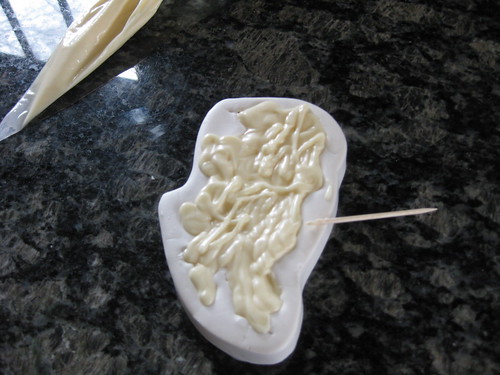
For solid areas of color, you can use the tip of your bag to get down into the details and fill in as you go. The neater you are when you fill now, the less clean up you will have to do at the end. After you have filled the mold, take a toothpick and use it to stir and smooth the candy and clean up the edges of the mold. If you have no colored details, you can also use the toothpick to ensure the candy has gotten into all the corners of the mold.
If you would like to add colored details, you must do that before you fill in the main color. Here, I piped in the roses and let them set prior to adding the white.
This particular mold has many fine details, so it was important to have very warm melted candy and a fine tip to get into the little corners. I sometimes have a hard time seeing what the details will be from reversed image you get looking at just the mold, so before I choose to add color I like to create a solid candy in the mold and look for things like flowers or ribbons that I want to have in color. If you hate the solid one, you can always re-melt the candy and use it again. Be careful when you re-melt the candy melts or chocolates. They do not always melt as slowly the second time, and if you try to re-melt them too many times they do get a bit funky. You can some times get uneven color or spotting or a bit of a frosted white look to your end piece as the repeated melting affects the tempering of chocolate.
Once the detail colors have set, fill in with your back ground color. This time as you smooth with your toothpick, be aware that if you stir too deeply you can end up mixing in your contrast color. This is a nice effect if you are going for marble or swirls, but if you want crisp edges you should avoid poking down too deep.
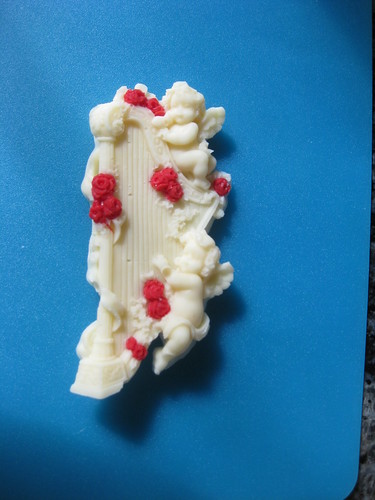
Now, wait for your candy to set. If you are impatient you can put them in the freezer to speed up the process. When I remove the molds, I loosen all around the edges before I pop out the entire piece. DTC molds are extremely flexible, even out of the freezer. Here is a close up of the harp with red roses.
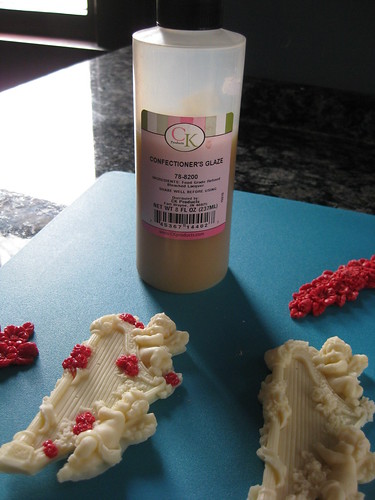
If this is a show piece and you really want to make it pop, brushing on a dab of Confectioners Glaze will make your candy very shiny. I used it on only the roses to add to the contrast.
In this image you can see, the solid red flowers are glazed, and the ones with contrasting white buds are not. You can also see how the roses on the harp stand out, making the matte white look more like marble or an ivory statue. It is a very nice finishing effect.




No comments:
Post a Comment