Thursday, March 31, 2011

Decorate the Cake- Mystery project part 2

When I saw these molds I thought that the harp looked so like a Michelangelo sculpture, I tried to get that effect by using chocolate and candy melts which are opaque instead of using poured sugar.  The result does in fact look like a statue and would make a great stand alone candy piece, or be lovely atop a wedding cake or valentine. 

To make these candy molds, you can use either candy melts, or almond bark or melting chocolate.  I feel like it is more economical to use almond bark when color is not necessary.   You will also need a decorator piping bag for each color you plan to use.  Depending on the temperature in your kitchen and how fast you work, you may also like to use a heated work surface.  I use a heating pad under a cookie sheet when my candy is setting too quickly.  I also like to work with multiple molds and colors at the same time. If multi-tasking is not your thing, you can plan your layers of color and work one color at a time.  

Put your candy melts or chopped up almond bark into the decorators bags.  Melt in the microwave at 30 second intervals one bag at a time. Be sure to check for hot spots, mash the bags around to mix, and towards the end I often drop down to 15 second intervals to ensure that I don't burn the candy or melt the plastic. Depending on how fast you work and the temperature in your work space you might need to experiment with out long you melt your candy. 


Once the candy is melted, snip the tip of the bag.  For very fine detailed work, go about 1/8th of an inch.  For larger areas, you can go a bit bigger. 


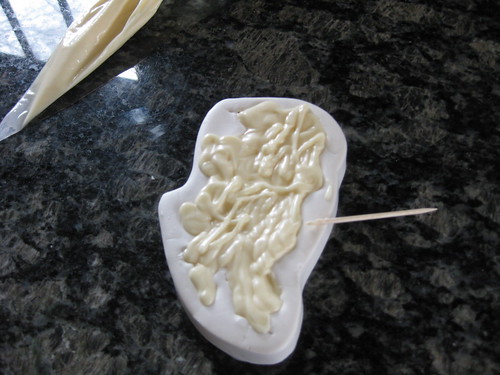
For solid areas of color, you can use the tip of your bag to get down into the details and fill in as you go. The neater you are when you fill now, the less clean up you will have to do at the end.  After you have filled the mold, take a toothpick and use it to stir and smooth the candy and clean up the edges of the mold.  If you have no colored details, you can also use the toothpick to ensure the candy has gotten into all the corners of the mold. 


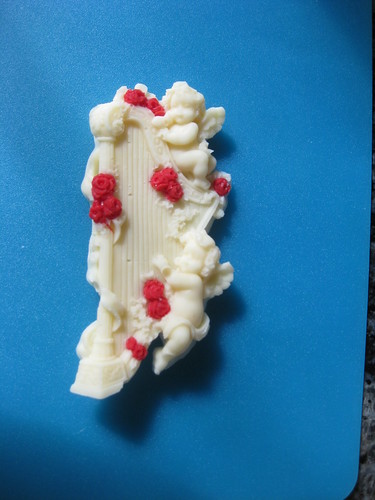
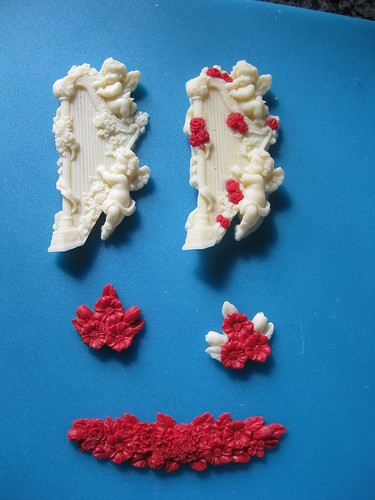
If you would like to add colored details, you must do that before you fill in the main color.  Here, I piped in the roses and let them set prior to adding the white. 


This particular mold has many fine details, so it was important to have very warm melted candy and a fine tip to get into the little corners.   I sometimes have a hard time seeing what the details will be from reversed image you get looking at just the mold, so before I choose to add color I like to create a solid candy in the mold and look for things like flowers or ribbons that I want to have in color.  If you hate the solid one, you can always re-melt the candy and use it again.  Be careful when you re-melt the candy melts or chocolates.  They do not always melt as slowly the second time, and if you try to re-melt them too many times they do get a bit funky. You can some times get uneven color or spotting or a bit of a frosted white look to your end piece as the repeated melting affects the tempering of chocolate. 

Once the detail colors have set, fill in with your back ground color.  This time as you smooth with your toothpick, be aware that if you stir too deeply you can end up mixing in your contrast color.  This is a nice effect if you are going for marble or swirls, but if you want crisp edges you should avoid poking down too deep. 


Now, wait for your candy to set. If you are impatient you can put them in the freezer to speed up the process. When I remove the molds, I loosen all around the edges before I pop out the entire piece.  DTC molds are extremely flexible, even out of the freezer. Here is a close up of the harp with red roses. 


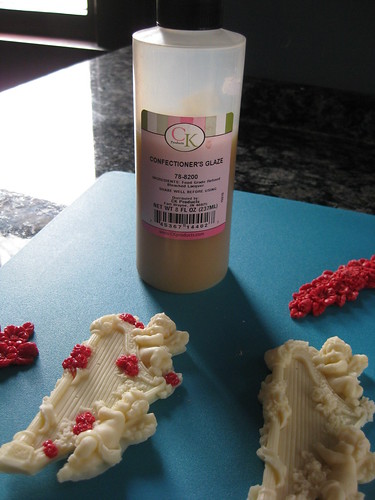
If this is a show piece and you really want to make it pop, brushing on a dab of Confectioners Glaze will make your candy very shiny.  I used it on only the roses to add to the contrast.  


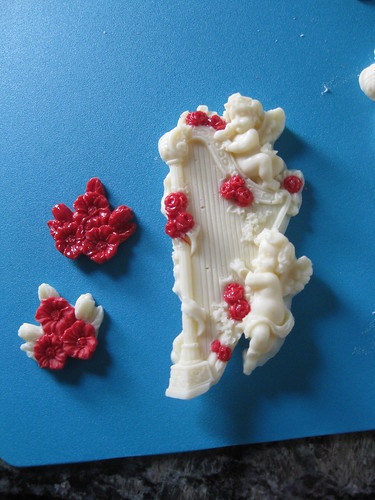
In this image you can see, the solid red flowers are glazed, and the ones with contrasting white buds are not. You can also see how the roses on the harp stand out, making the matte white look more like marble or an ivory statue.  It is a very nice finishing effect. 


Decorate the Cake - Mystery Project!

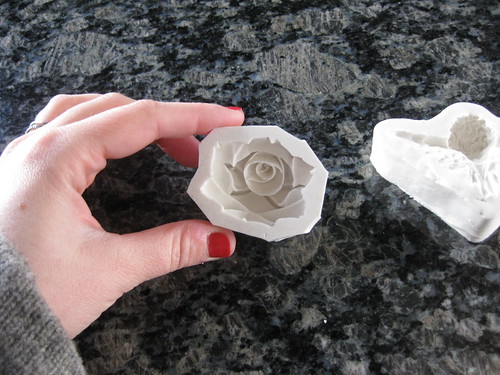
I was pleasantly surprised to find my Mystery Project was several lovely rose molds, a harp, and cupid.  The largest of the rose molds was the perfect size to do something slightly different than your typical Decorate the Cake how to,  molded butter!  Now, to create a lovely butter to accompany a romantic dinner the choice of mold is very important.  Butter is softer and more fragile than candy.  It is brittle when its cold, and very soft at room temperature.  Unlike gum paste or fondant, butter never hardens. It can be a tricky substance to mold, and your selection of a shape or mold to use will make or break your finished product.  To illustrated this very important point, I have included a "what not to do" example along with my how to.

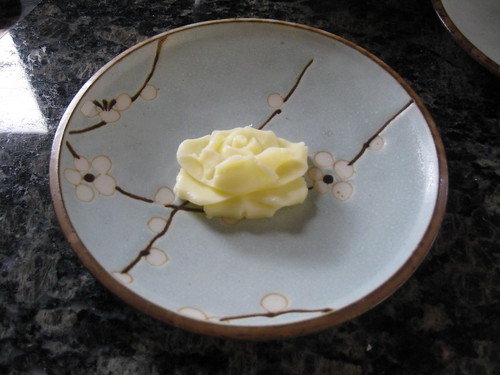
My choice mold for the butter.  Notice, the rose is deep and round, compact and with out too many outlying shapes.

And equally adorable, but ill-suited for a butter application, we have cupid. See how cupids wings are very shallow? Watch what happens to poor Cupid. 


To create the butter mold, the easiest way to get the most details from your mold is to melt your butter. The liquid butter runs into every nook and cranny. You can also use softened butter and spackle it in with a butter knife, but I find that there are many air pockets and you lose details in your finished product. The trick to using melted butter is to be careful to not over-melt the butter. Butter has a high water content, and if over heated the water can evaporate out of the butter and mess up the consistency. I put two pats of butter in the microwave for 30 seconds until it looks like this. 


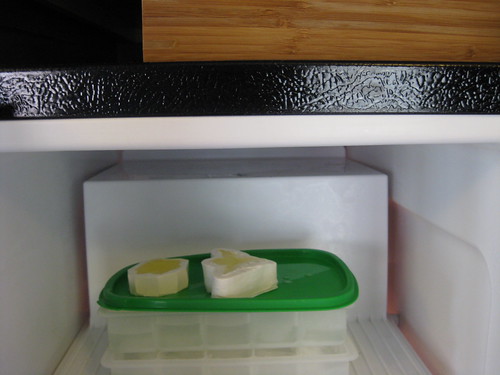
A few seconds of stirring ensures that it is melted completely and not over melted.  Then pour into your molds and put in the freezer to set for 5 or 10 minutes.  The amount of time it takes to set will depend on how large your mold is and how hot your butter was.  The good news is that you can't over-freeze butter. Frozen butter  comes right back to room temperature beautifully, so when in doubt leave it in 5 minutes more before you fuss with it.  Also, be aware that liquid butter is happy to spill all over your freezer, so take out some insurance by placing the molds on a tray with a lip.  It is easier to keep things level, and to clean up spills. 


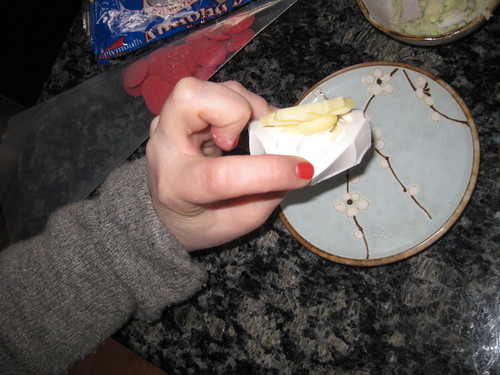
Now comes the fun part!  Time to un-mold!  DTC molds are extremely flexible.  I like to pull back all around the edges before I pop out the molded item.  If your butter is set hard enough, and your mold was compact and round, it will come out just like a chocolate or hard candy. 


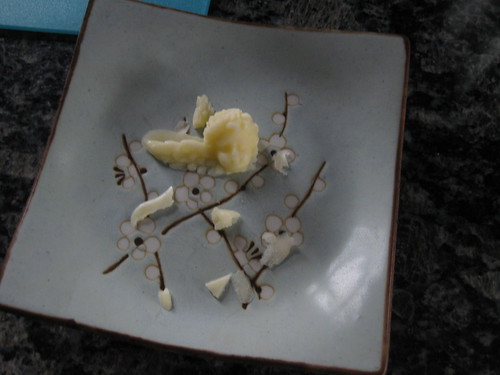
If your mold had thin feather wings like our friend Cupid, or very shallow parts here is what happens. Notice, the wing I over poured came out, but with that ugly extra lip. Cupid's head was deep and round, it looks good.  But that thin little wing was just too brittle and it fell apart, along with the v shaped feathers under his face. There are just some shapes and designs that are not meant to be in butter.  


But look at our lovely rose! 


Now, if plain old butter is too boring for you, get creative!  There are hundreds of delicious herb butter recipes out there. Here are a couple tips for making molded herb butter. 

#1 The tinier the pieces of herbs, the less they will poke out or interrupt the design of your mold. Remember, we are doing this for the beauty of the finished piece and not just the flavor. 
#2 Just because every recipe on the planet says to use fresh herbs doesn't mean you cant use dry, or even better, freeze dried. Dry herbs tend to be in smaller pieces and mix into liquid butter easier than fresh. 
#3 Experiment with your favorite flavor combinations!  You don't need a recipe. Choose something to go along with whatever recipe you are making for the meal.. Herb Butter is a delicious addition on top of mashed potatoes, steak, fish or chicken as well as breads and rolls. 
#4  If you are using unsalted butter and making a savoury herb butter, be sure to add some salt! 

A few flavor profiles that I really love:  
Garlic Powder and Thyme
Honey and Cinnamon
Cardamom and Curry Powder
Chive and Onion Powder
Ginger (I like to use fresh grated)
Lemon and Dill. 

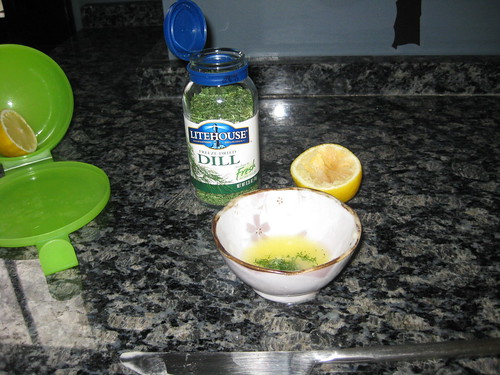
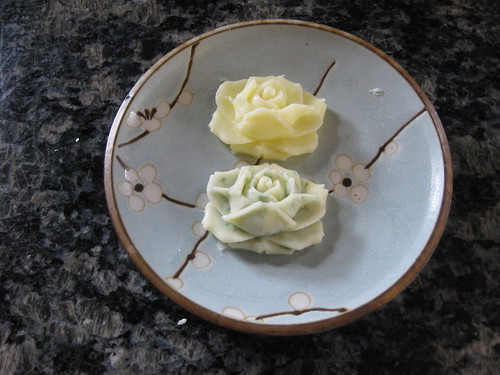
Here is how I made the Lemon Dill Butter.  I used freeze dried dill, but dry or fresh would work as well.  Be sure to start with either melted or softened butter to make it easier to mix.  Just a splash of lemon is enough, so start with a little and then adjust for taste.  Remember, butter has a large water content, so it can take liquid ingredients if you mix well and use the right proportions.  Mix well, mold, and put in the freezer to set! 


And here are my final roses, ready to sit atop a fresh bun! 


Stay tuned for part 2, a more traditional molded candy. 

Wednesday, March 23, 2011

Iron Chef Dinner: Battle Beer

Me -vs- my inability to do anything in moderation

I am limiting myself to iron chef dinners one day a week now.  This is to limit the grocery bills, and so that I actually accomplish other things with my time besides cooking. Not that we mind eating it all. :)

This desire to be more moderate includes trying to use what ingredients we have instead of purchasing tons of new items every week.  So for battle beer I tried to use only what was in the house.  Our land lord left us with two bottles of Winter Bourbon Ale in the fridge when we moved in and I recently bought some Honey Brown for nostalgia's sake (and then continued to drink nothing but wine as usual). I couldn't really make an iron chef beer dinner with out including Guinness though, so I caved on that one and ran out and picked some up. Choosing my dishes was not easy as beer lends itself to many delicious things, so instead of making less dishes I just made smaller servings.  Still, too much food. So much that we actually skipped the entree. So much for moderation.

Appetizer #1 was baked brie filled with a mushroom mixture that had been sauteed in the Winter Ale.  Dan tasted it and said "It smells like Thanksgiving." and even though it was nothing like Thanksgiving, there was something about the mushroom and herbs and puff pastry that really did smell like it.

Appetizer #2 was Fish and Chips, battered in a Honey Brown beer batter.
The fish was tillapia in a seasoned batter, and the "chips" were various veggies like carrots, parsnips, beets, peppers, and onions. I tried really hard to make this a small dish, but that beer batter just puffs up.


Our Entree was Guinness Shepard's pie.  We are going to eat it for dinner tomorrow. It smelled good.


And finally, the piece de resistance:  Guinness Chocolate cake frosted with Bailey's buttercream.

Which I have decided to call Irish Car Bomb Cake.  Dan decided to make himself an Irish Car Bomb with the leftovers.

Thursday, February 10, 2011

Iron Chef Dinner: Battles Venison Steaks and Pecans

Me -vs- Unpacking the Kitchen

Well we made it to Michigan, and I unpacked the kitchen.  You all know what that means!
After 2 weeks of eating pantry and freezer items and take out and restaurant food, it was time for Iron Chef!

The last freezer item from the old place was two venison steaks from a deer that was lovingly shot by our friend Mash. The first item in our new freezer was a package of frozen corn left by the girl who lived here before us.  The dish was inspired by Allison.  I cut the steaks into medallions and coated them with flour. Then I seared them in a pan to medium rare. I set the steaks aside and sauteed onions and mushrooms and added some chicken stock and cream to make a sauce.  I served the steaks and mushroom sauce over mashed potatoes with corn on the side and a squeeze of lemon.   Instant mashed potatoes, but shhh. dont tell.  
I managed to snap a photo with my phone before Dan devoured everything.


For battle pecan, I may have gone overboard, but it was good. :)

I made a pecan caramel corn that was just the right balance of savory and sweet.  I normally hate caramel corn because its just sugary and gets stuck in your teeth, but the salt on this was just right. I also got Dan some whole pecans in the shell to snack on before dinner. There is something nice about freshly cracking, peeling, butchering, or picking your own food. I think working for it makes it taste better.

Dinner was Pecan crusted chicken Kiev, with broccoli pecan casserole and a green salad with a cranberry pecan vinaigrette.  Chicken Kiev, while delicious, is one of those things that should only be made rarely.  The amount of work it takes is RIDICULOUS.  One of the recipes I saw called for making like 8 servings, and it makes sense now.  They freeze really well uncooked, and you only mess up the kitchen once.   The broccoli casserole was tasty and easy, it had a cheesy creamy sauce with horseradish in it.   The pecan vinaigrette was really great, and Ill be making that again. I blended some dried cranberries and pecans together to make a pasty mealy consistency, just before it would have turned into nut butter.  Then I added red wine vinegar and olive oil and some honey and herbs.

Dessert was individual Chocolate Pecan Pies (recipe stolen from Paula Dean) and we never even got to them last night because we were so full.

No photos of this dinner either, I can't seem to find the camera in all this mess. :o\

I'm off to empty another box!